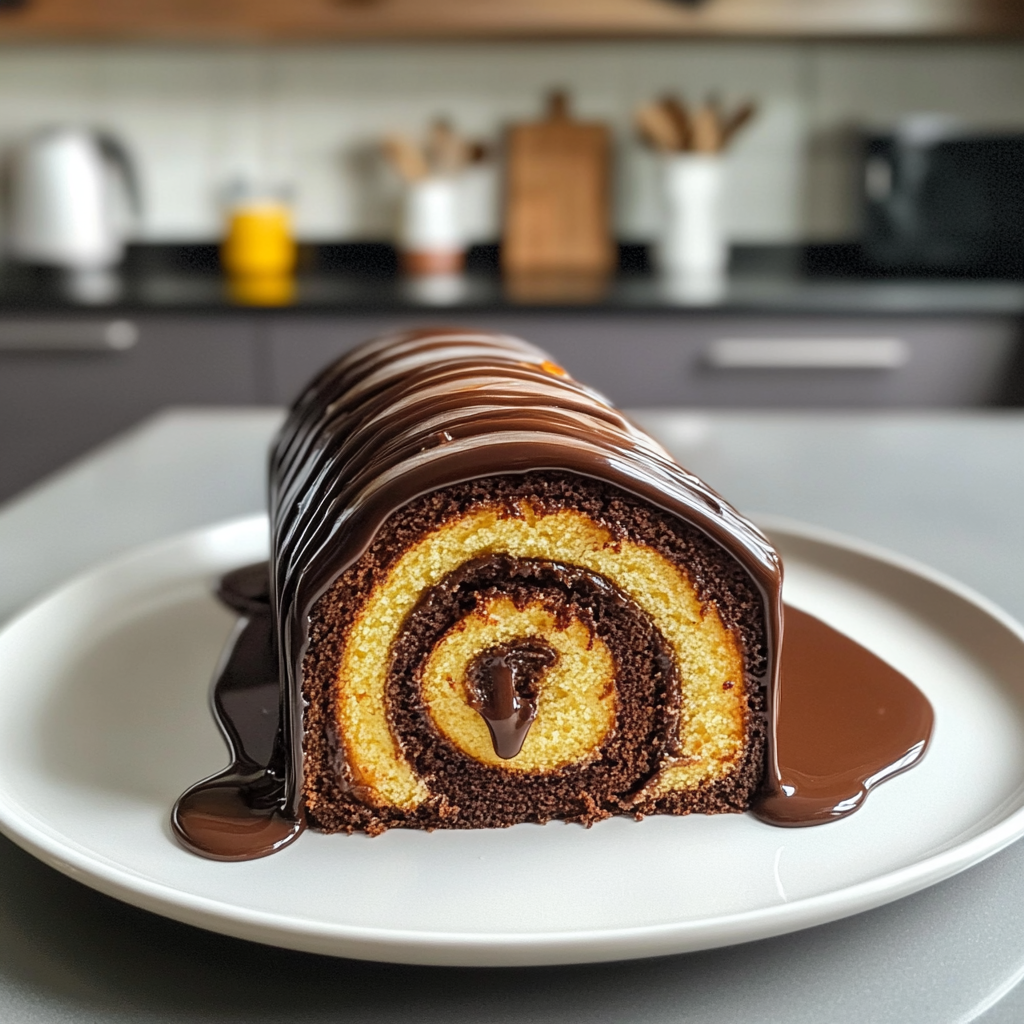
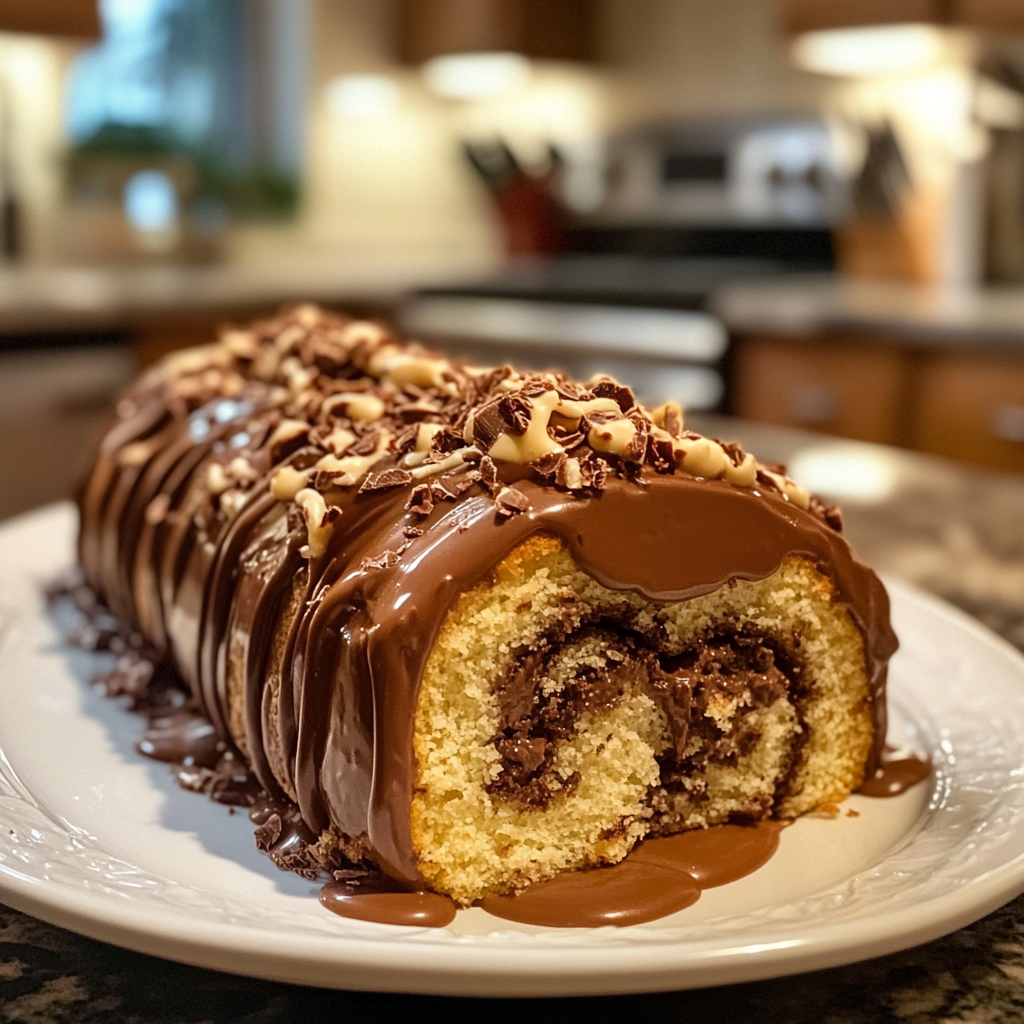
The rich aroma of chocolate wafts through the air as you envision a light, airy Chocolate Swiss Roll. This delightful dessert, with its luscious layers of chocolate sponge and creamy filling, is like a hug for your taste buds. chocolate-filled pastries As you slice into it, the gentle swirl reveals its beautiful marbled pattern, promising a flavor explosion that will take your senses on a roller coaster ride. fun dessert variations.

Jump to:
- <strong>Essential Ingredients</strong>
- <strong>Let’s Make it Together</strong>
- Preparing Your Base
- Mixing Dry Ingredients
- Beating Eggs
- Combining Mixtures
- Baking Time
- Preparing Filling
- Rolling It Up
- Final Steps
- <strong>Perfecting the Cooking Process</strong>
- <strong>Add Your Touch</strong>
- <strong>Storing & Reheating</strong>
- <strong>FAQ</strong>
- Can I use gluten-free flour in my Chocolate Swiss Roll?
- How do I prevent my roll from cracking?
- What fillings work best with Chocolate Swiss Roll?
- 📖 Recipe Card
Remember that holiday gathering when everyone gathered around the table, eyes wide with anticipation? The moment I unveiled my Chocolate Swiss Roll, it felt like I had just presented the crown jewel of desserts. Laughter filled the room as friends and family eagerly dove in, their faces lighting up with pure delight. perfect brunch desserts indulgent chocolate desserts There’s just something magical about this treat that makes it perfect for celebrations or simply indulging on a lazy Sunday afternoon.
Why You'll Love This Recipe
- This Chocolate Swiss Roll is incredibly easy to whip up, making it perfect for both novice bakers and seasoned pros
- The flavor profile balances rich chocolate with a light cream filling that’s simply divine
- Visually stunning, this roll makes an impressive centerpiece for any dessert table
- It’s versatile enough to customize with your favorite fillings or toppings for added flair
My cousin once said my Chocolate Swiss Roll was so good she could marry it!

Essential Ingredients
Here’s what you’ll need to make this delicious dish: For more inspiration, check out this Delicious Greek Yogurt Muffins recipe.
All-purpose Flour: Use finely milled flour for the best texture; it helps create that light sponge we adore.
Cocoa Powder: Opt for high-quality cocoa powder; it deeply enriches the chocolate flavor in the roll.
Granulated Sugar: This sweet ingredient adds sweetness and contributes to the lightness of the sponge.
Baking Powder: A must-have leavening agent that gives our roll its fluffy texture.
Eggs: Fresh eggs are key; they provide structure and help achieve a beautiful rise.
Butter: Use unsalted butter for better control over the saltiness of your dessert.
Heavy Cream: Whip this to fluffy perfection for a decadent filling that brings everything together.
Powdered Sugar: A bit of sweetness to balance out the richness of the cream filling.
Vanilla Extract: Pure vanilla extract enhances flavors and adds warmth to your dessert.
The full ingredients list, including measurements, is provided in the recipe card directly below.
Let’s Make it Together
Preparing Your Base
First things first—preheat your oven to 350°F (175°C). Grab a baking sheet and line it with parchment paper. This step ensures your roll won’t stick like an awkward dance partner at a wedding.
Mixing Dry Ingredients
In a large bowl, whisk together flour, cocoa powder, baking powder, and sugar until they blend seamlessly. You want everything to be homogenous—like a well-rehearsed choir!
Beating Eggs
In another bowl, beat your eggs until they’re pale and frothy—about three minutes should do. You’ll know you’re there when they look like little clouds ready for dessert heaven!
Combining Mixtures
Now gently fold the dry ingredients into your egg mixture using a spatula. Be careful not to over-mix; we want to keep that lovely airiness intact!
Baking Time
Pour your batter onto the prepared baking sheet and spread it evenly. Bake in the preheated oven for 12-15 minutes or until set. When you take it out, let it cool slightly but don’t wander off too far; temptation might lead you astray!
Preparing Filling
While waiting for your base to cool down, grab another bowl and whip together the heavy cream, powdered sugar, and vanilla extract until soft peaks form. It should be lighter than your mood after finishing an episode of your favorite show.
Rolling It Up
Once cool enough to handle but still slightly warm (trust me), flip the cake onto another piece of parchment paper dusted with powdered sugar. Carefully peel off the top layer of parchment paper; now is not the time for clumsy moves! Spread your whipped cream mixture evenly across the surface.
Final Steps
Starting from one end, gently roll up the cake along with the parchment paper. Don’t worry if it cracks slightly; those imperfections add character! Wrap it tightly in plastic wrap and refrigerate for at least one hour before serving.
Now you have successfully created a Chocolate Swiss Roll that will impress anyone lucky enough to snag a piece! Serve slices garnished with fresh berries or extra whipped cream if you’re feeling fancy—or just because who doesn’t love more cream?
Enjoy every last bite and get ready for compliments galore!
You Must Know
- Mastering the Chocolate Swiss Roll means understanding the delicate balance of flavors and textures
- This cake can be a showstopper, perfect for birthdays or celebrations
- The aroma of chocolate wafting through your kitchen will be irresistible, making it hard to resist sneaking bites along the way
Perfecting the Cooking Process
Start by whisking eggs and sugar until fluffy, then gently fold in the flour and cocoa for a light batter. Pour it onto a lined baking sheet and bake until set but still soft.
Add Your Touch
Feel free to swap out the chocolate for matcha or vanilla for a unique twist. Add fresh berries or whipped cream inside for an extra burst of flavor!
Storing & Reheating
Wrap any leftover Chocolate Swiss Roll tightly in plastic wrap and store it in the fridge. For best results, enjoy within three days—no one likes sad, stale cake! For more inspiration, check out this White Chocolate Raspberry Bundt Cake recipe.
Chef's Helpful Tips
- To achieve that perfect roll, ensure your cake is fully cooled before filling
- Using parchment paper helps prevent sticking during rolling
- If cracks appear, don’t fret; a little frosting covers all sins!
Sharing my first attempt at making this Chocolate Swiss Roll was nerve-wracking yet rewarding; my friends devoured it and begged for seconds, which made me feel like a baking superstar.
FAQ
Can I use gluten-free flour in my Chocolate Swiss Roll?
Yes, gluten-free flour works well; just make sure it’s a 1: 1 blend.
How do I prevent my roll from cracking?
Ensure your cake is cool before rolling, and roll gently to avoid cracks.
What fillings work best with Chocolate Swiss Roll?
Try whipped cream, fruit preserves, or even chocolate ganache for delicious fillings.
Did You Enjoy Making This Recipe? Please rate this recipe with ⭐⭐⭐⭐⭐ or leave a comment.
📖 Recipe Card
Print
Chocolate Swiss Roll
- Total Time: 35 minutes
- Yield: Serves approximately 8 slices 1x
Description
Indulge in the delightful experience of making a Chocolate Swiss Roll—a light, airy dessert that combines rich chocolate sponge with a creamy filling. This elegant treat is perfect for any celebration or a cozy afternoon indulgence. With its beautiful marbled pattern and melt-in-your-mouth texture, this recipe promises to impress your friends and family, leaving them craving more.
Ingredients
- 1/2 cup all-purpose flour
- 1/3 cup cocoa powder
- 1/2 cup granulated sugar
- 1 tsp baking powder
- 4 large eggs
- 1/4 cup unsalted butter, melted
- 1 cup heavy cream
- 1/4 cup powdered sugar
- 1 tsp vanilla extract
Instructions
- Preheat oven to 350°F (175°C) and line a baking sheet with parchment paper.
- In a bowl, whisk together flour, cocoa powder, baking powder, and sugar.
- In another bowl, beat eggs until pale and frothy (about 3 minutes).
- Fold dry ingredients into egg mixture gently to maintain airiness.
- Spread batter onto the prepared baking sheet and bake for 12-15 minutes until set.
- Let cool slightly before transferring to powdered sugar-dusted parchment paper.
- Whip heavy cream with powdered sugar and vanilla until soft peaks form; spread over cooled cake.
- Roll the cake using parchment paper and refrigerate for at least an hour before slicing.
- Prep Time: 20 minutes
- Cook Time: 15 minutes
- Category: Dessert
- Method: Baking
- Cuisine: American
Nutrition
- Serving Size: 1 slice (65g)
- Calories: 200
- Sugar: 14g
- Sodium: 85mg
- Fat: 10g
- Saturated Fat: 6g
- Unsaturated Fat: 3g
- Trans Fat: 0g
- Carbohydrates: 26g
- Fiber: 2g
- Protein: 3g
- Cholesterol: 100mg