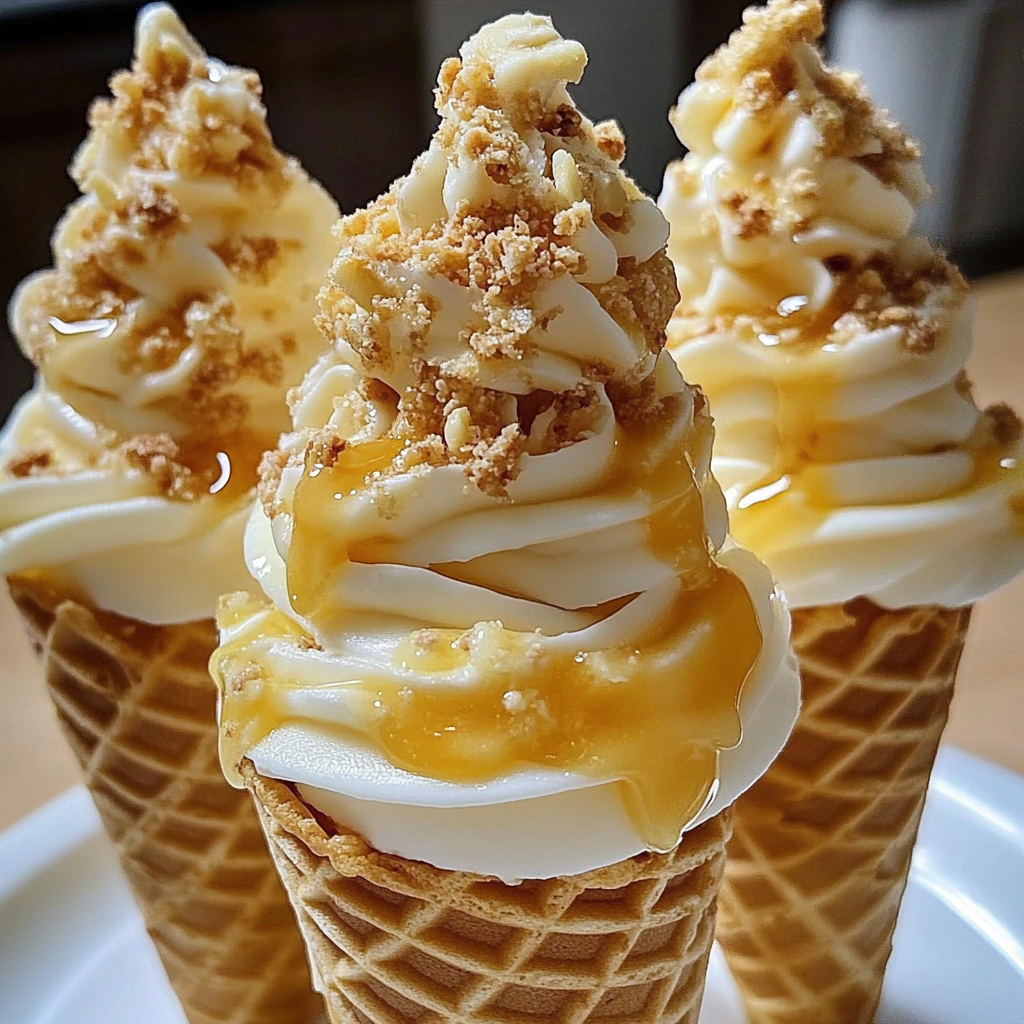
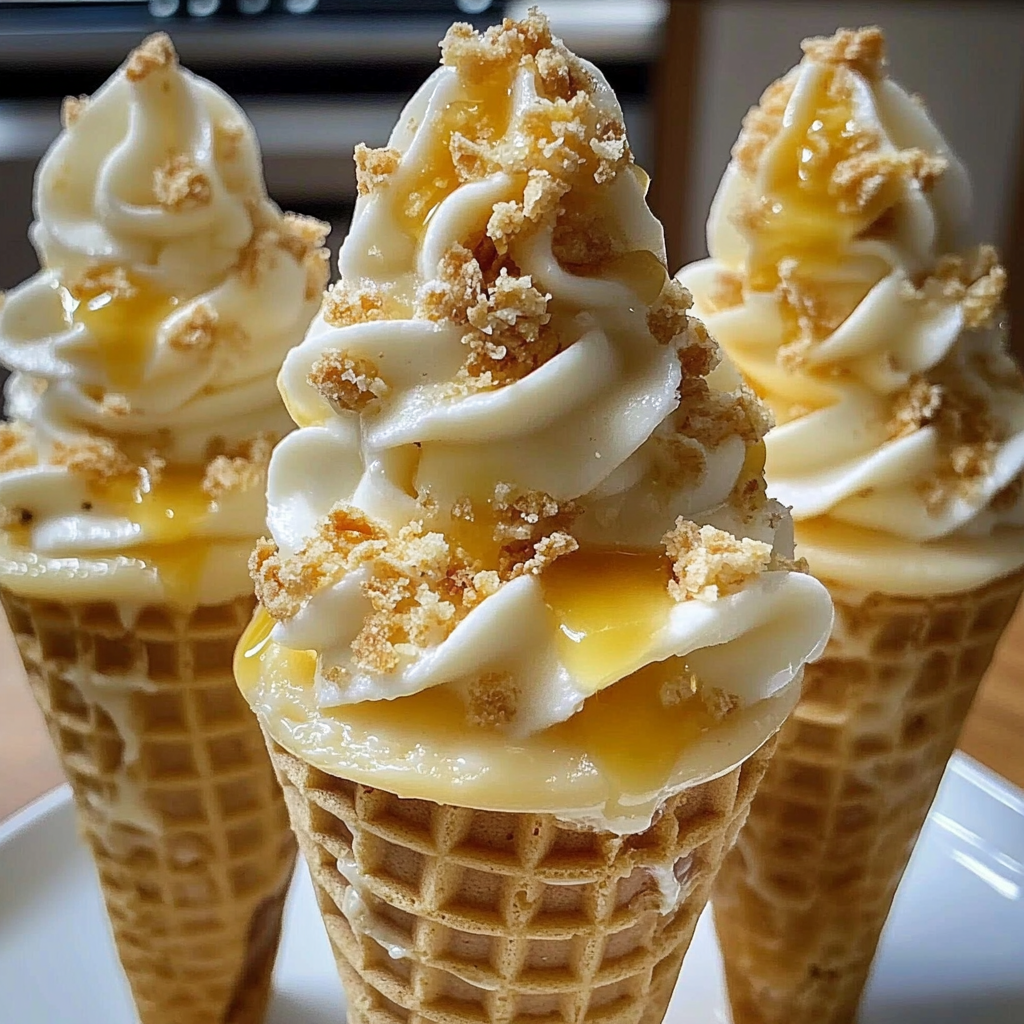
There’s something downright magical about the combination of banana pudding and cheesecake, especially when you present it in a fun, edible cone. Imagine biting into a crispy wafer cone filled with creamy, dreamy cheesecake batter infused with the sweet aroma of ripe bananas, all topped off with fluffy whipped cream. savory feta cheesecake The first taste transports you straight to dessert heaven!

Jump to:
- <strong>Essential Ingredients</strong>
- <strong>Let’s Make it Together</strong>
- <strong>Perfecting the Cooking Process</strong>
- <strong>Add Your Touch</strong>
- <strong>Storing & Reheating</strong>
- <strong>FAQ</strong>
- Can I use store-bought pudding mix?
- How long do these cones last?
- Can I make these ahead of time?
- 📖 Recipe Card
Whether it’s a summer picnic or a cozy family gathering, these Banana Pudding Cheesecake Cones are the show-stopping dessert that everyone will be talking about. The crunch of the cone meets the silky smoothness of the cheesecake filling, creating an unforgettable flavor explosion. Get ready for some serious yum! For more inspiration, check out this creamy raspberry cheesecake bites recipe.
Why You'll Love This Recipe
- These Banana Pudding Cheesecake Cones are easy to whip up and perfect for any occasion
- The burst of flavors will make your taste buds dance in delight
- Plus, they look stunning on any dessert table!
- Versatile enough for parties yet simple enough for a weeknight treat
I once made these cones for my cousin’s birthday party and watched as kids and adults alike dove in with unabashed joy—the kind of joy usually reserved for Christmas morning or finding an extra fry at the bottom of the bag.
Essential Ingredients
Here’s what you’ll need to make this delicious dish:
- Graham Cracker Crumbs: Use finely crushed crumbs to create a base that mimics traditional cheesecake crust.
- Softened Cream Cheese: Make sure it’s softened to room temperature for easy mixing; nobody likes lumpy cheesecake!
- Sweetened Condensed Milk: This adds rich sweetness and creaminess—no one can resist its charm.
- Ripe Bananas: Select bananas that have just begun to spot for maximum sweetness and flavor.
- Whipped Topping: Go for store-bought or homemade; this adds fluffiness to your cones.
- Ice Cream Cones: Choose regular or mini cones depending on your serving preference; both work beautifully! bite-sized mini quiches.
- Vanilla Extract: A splash enhances all the flavors in this decadent treat—don’t skip it!
- Cinnamon (optional): A pinch can elevate your bananas’ flavor profile and add warmth.
The full ingredients list, including measurements, is provided in the recipe card directly below.
Let’s Make it Together
Get ready to embark on this sweet adventure step by step!
Prepare Your Filling: In a large bowl, combine softened cream cheese and sweetened condensed milk until smooth. Use an electric mixer for best results—it saves time and effort!
Add Flavors: Mix in ripe bananas until they’re well incorporated but still slightly chunky. You want those banana bursts throughout each bite—yum!
Finish with Whipped Topping: Gently fold in whipped topping until everything is combined nicely. Take care not to deflate that light, airy texture; we want fluffy cones!
Assemble Your Cones: Spoon generous amounts of the banana cheesecake mixture into each ice cream cone. Don’t be shy here; fill them up high like they’re little ice cream towers!
Add Toppings: If desired, top your filled cones with additional whipped topping and sprinkle some graham cracker crumbs or banana slices for that extra flair.
Chill Before Serving: Place assembled cones in the fridge for about 30 minutes before serving. This allows everything to set beautifully while you resist devouring them immediately!
Now you have a delightful dessert that is sure to impress everyone! Enjoy every last bite of these Banana Pudding Cheesecake Cones because they are simply irresistible! strawberry cheesecake dessert tacos.
You Must Know
- Banana Pudding Cheesecake Cones are a delightful twist on traditional desserts, combining creamy cheesecake with the nostalgic taste of banana pudding
- The crunchy cones add a fun texture, making each bite an adventure
- Perfect for parties or a cozy night in
Perfecting the Cooking Process
Start by preparing the cheesecake filling while your cones chill in the fridge. This ensures a smooth texture that holds up beautifully when assembled.
Add Your Touch
Feel free to swap vanilla extract for almond extract for a unique flavor twist. Adding chocolate chips can elevate your dessert into a whole new delicious territory. orange chocolate cupcakes.
Storing & Reheating
Store any leftover filled cones in an airtight container in the fridge for up to two days. Avoid freezing; it affects the cone’s crunchiness.
Chef's Helpful Tips
- For perfect Banana Pudding Cheesecake Cones, ensure cream cheese is at room temperature for easy mixing
- Use ripe bananas for maximum sweetness and flavor
- Pair with whipped cream for extra decadence and visual appeal
It was at my cousin’s birthday party when I first served these Banana Pudding Cheesecake Cones. Everyone raved about them, even my picky cousin who usually avoids anything green or fruity!
FAQ
Can I use store-bought pudding mix?
Absolutely! Store-bought pudding saves time and still tastes delicious in these cones.
How long do these cones last?
Filled cones last about two days in the refrigerator before they lose their crunch.
Can I make these ahead of time?
Yes! Prepare the filling a day before and fill just before serving for best results.
Did You Enjoy Making This Recipe? Please rate this recipe with ⭐⭐⭐⭐⭐ or leave a comment.
📖 Recipe Card
Print
Delightful Banana Pudding Cheesecake Cones
- Total Time: 20 minutes
- Yield: Serves 6 cones 1x
Description
Experience the blissful fusion of banana pudding and cheesecake in a fun, edible cone! These Banana Pudding Cheesecake Cones are filled with creamy cheesecake batter blended with ripe bananas and topped with fluffy whipped cream. Perfect for summer picnics or cozy family gatherings, this dessert is sure to be the highlight of any occasion. Easy to make and irresistibly delicious, get ready for a flavor explosion that will leave everyone wanting more.
Ingredients
- 1 cup graham cracker crumbs
- 8 oz softened cream cheese
- 1 cup sweetened condensed milk
- 2 ripe bananas, mashed
- 1 cup whipped topping
- 6 ice cream cones (regular or mini)
- 1 tsp vanilla extract
- Pinch of cinnamon (optional)
Instructions
- In a large bowl, mix softened cream cheese and sweetened condensed milk until smooth using an electric mixer.
- Gently fold in mashed bananas and whipped topping until well combined.
- Spoon the mixture generously into each ice cream cone, filling them high.
- (Optional) Top with additional whipped topping and graham cracker crumbs or banana slices.
- Chill in the fridge for about 30 minutes before serving.
- Prep Time: 20 minutes
- Cook Time: 0 minutes
- Category: Dessert
- Method: No Cooking
- Cuisine: American
Nutrition
- Serving Size: 1 cone (80g)
- Calories: 210
- Sugar: 18g
- Sodium: 150mg
- Fat: 9g
- Saturated Fat: 5g
- Unsaturated Fat: 4g
- Trans Fat: 0g
- Carbohydrates: 31g
- Fiber: 1g
- Protein: 3g
- Cholesterol: 30mg