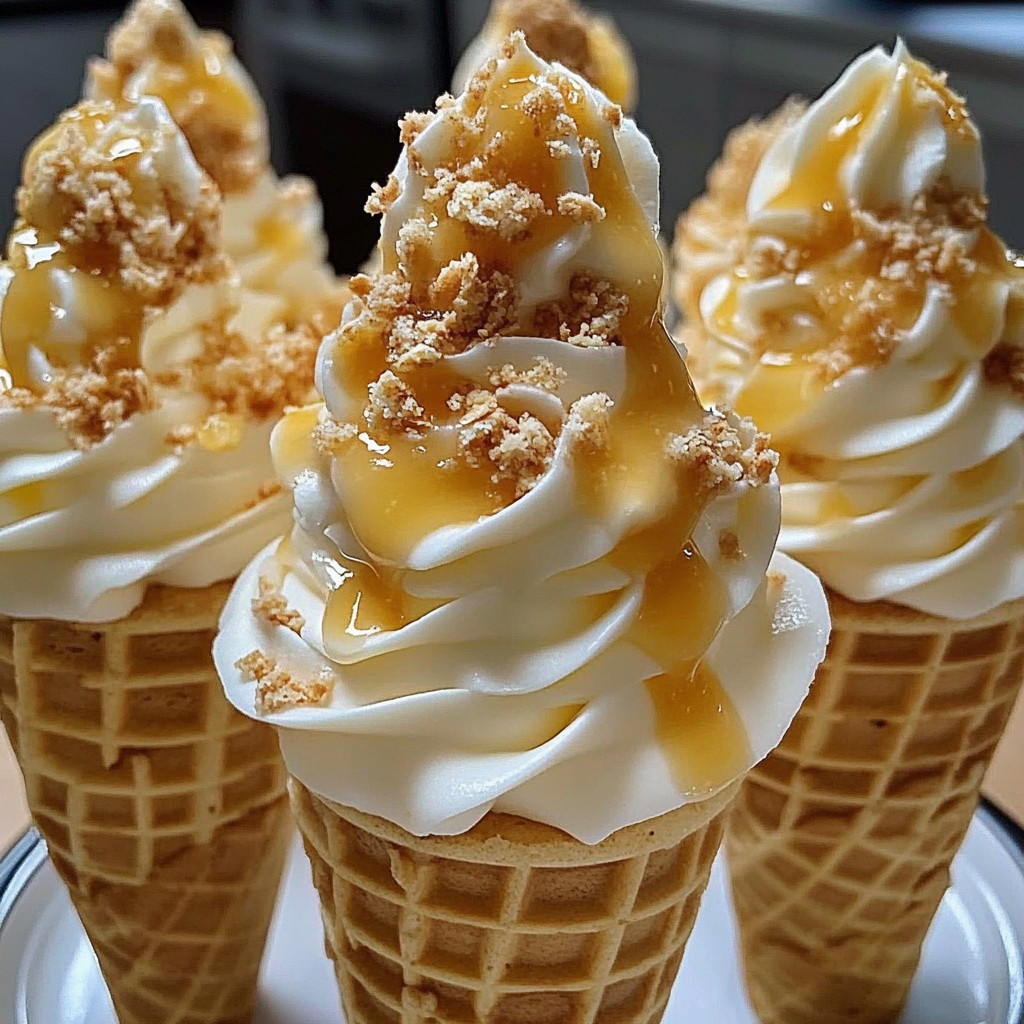
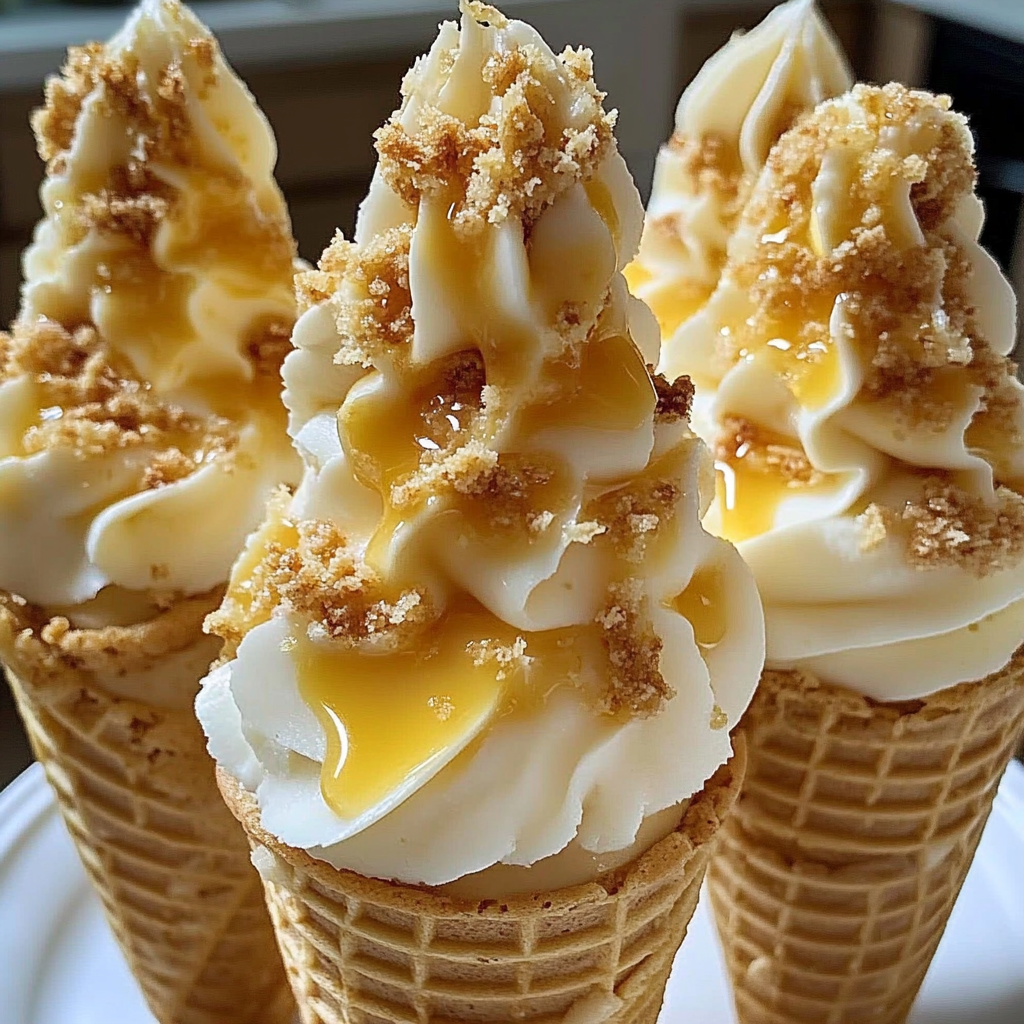
The moment you take a bite of a Banana Pudding Cheesecake Cone, your taste buds will throw a party. Imagine creamy layers of cheesecake mingling with sweet banana pudding, all nestled in a crunchy cone. Strawberry Crunch Cheesecake Bites The combination of textures and flavors creates an explosion of joy that’s hard to resist.
Jump to:
- <strong>Essential Ingredients</strong>
- <strong>Let’s Make it together</strong>
- <strong>Perfecting the Cooking Process</strong>
- <strong>Add Your Touch</strong>
- <strong>Storing & Reheating</strong>
- <strong>FAQ</strong>
- Can I make Banana Pudding Cheesecake Cones ahead of time?
- What can I use instead of vanilla wafers?
- How long do these cones last in the fridge?
- 📖 Recipe Card
I remember the first time I made these cones at a family gathering; my cousin’s face lit up like it was Christmas morning! These treats are perfect for summer parties or cozy gatherings, promising an unforgettable flavor experience that will have everyone clamoring for more.
Why You'll Love This Recipe
- These Banana Pudding Cheesecake Cones are easy to prepare, making them perfect for last-minute dessert decisions
- With their creamy texture and delightful crunch, they offer a delicious flavor profile that everyone will love
- Visually appealing and fun to eat, they bring excitement to any occasion
- Plus, they are versatile enough to customize with your favorite toppings or fruits
I’ll never forget how my aunt declared these cones a “game changer” after just one bite at our family picnic.
Essential Ingredients
Here’s what you’ll need to make this delicious dish:
Graham Cracker Crumbs: Use finely crushed crumbs for the best texture; they create a delightful crust.
Unsalted Butter: Melted butter brings everything together and adds richness to the crust.
cream Cheese: Use full-fat cream cheese for optimal creaminess; it makes the filling decadently smooth.
Sugar: Granulated sugar sweetens the cheesecake mixture perfectly; adjust based on personal preference. For more inspiration, check out this red velvet cheesecake brownies recipe.
Banana Pudding Mix: Instant pudding mix is quick and easy; it gives that classic banana pudding flavor. For more inspiration, check out this easy rice pudding recipe recipe.
Milk: Whole milk works best; it ensures a rich and creamy pudding consistency.
Whipped Topping: Use store-bought or homemade whipped topping for lightness and fluffiness in the filling.
Bananas: Ripe bananas add natural sweetness and flavor; slice them just before assembling to prevent browning.
Ice Cream Cones: Any type works, but sugar cones provide an extra layer of sweetness and crunch.
The full ingredients list, including measurements, is provided in the recipe card directly below.
Let’s Make it together
Create the Graham Cracker Crust: Start by preheating your oven to 350°F (175°C). In a bowl, mix graham cracker crumbs with melted butter until well combined. Press this mixture into the bottom of small cups if you’re not using cones.
Prepare the Cheesecake Filling: In another bowl, beat cream cheese until smooth. Gradually add granulated sugar while mixing until creamy. This makes your cheesecake filling irresistibly smooth.
Add the Banana Pudding Mix: Whisk together instant banana pudding mix and milk in a separate bowl until thickened. Gently fold this into the cream cheese mixture until well combined for that rich banana flavor.
Incorporate Whipped Topping: Carefully fold in whipped topping into the banana cheesecake mixture until fully blended. This gives it that light, airy texture we love in desserts!
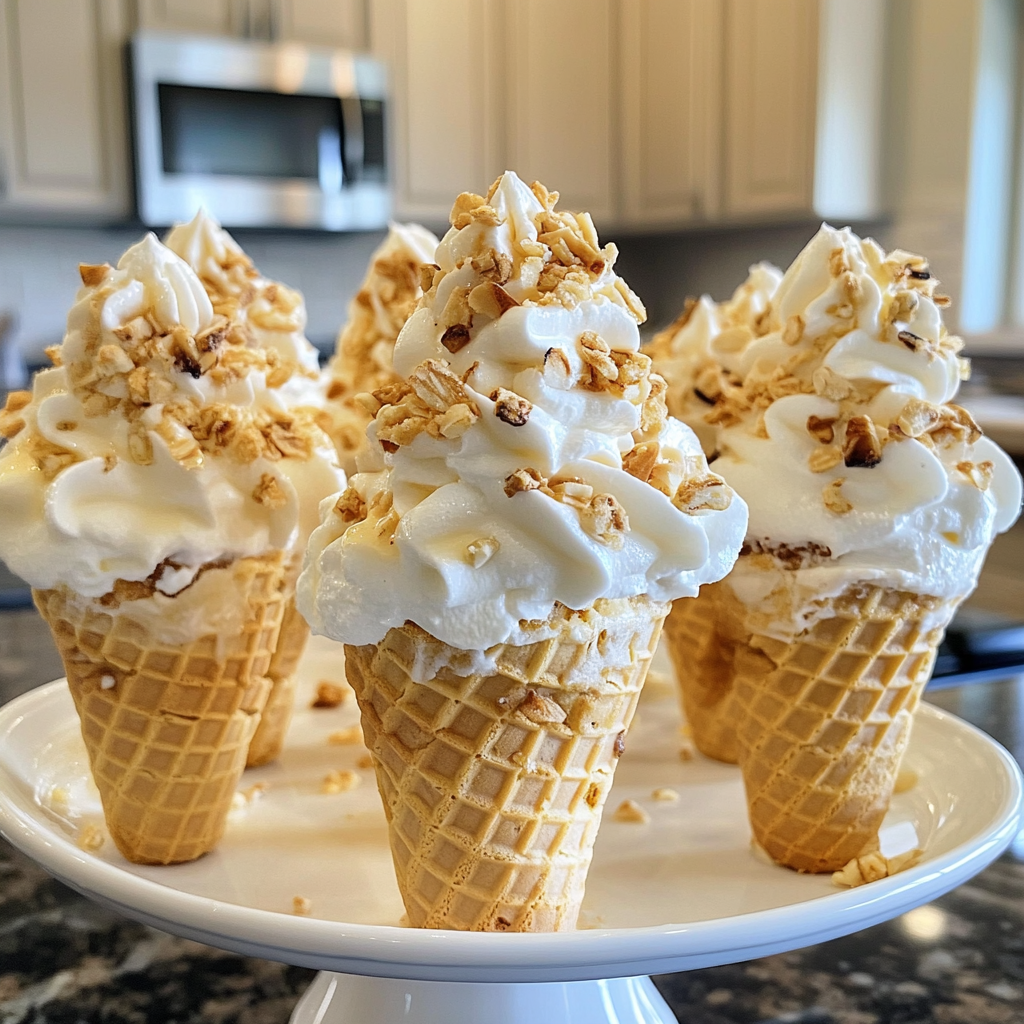
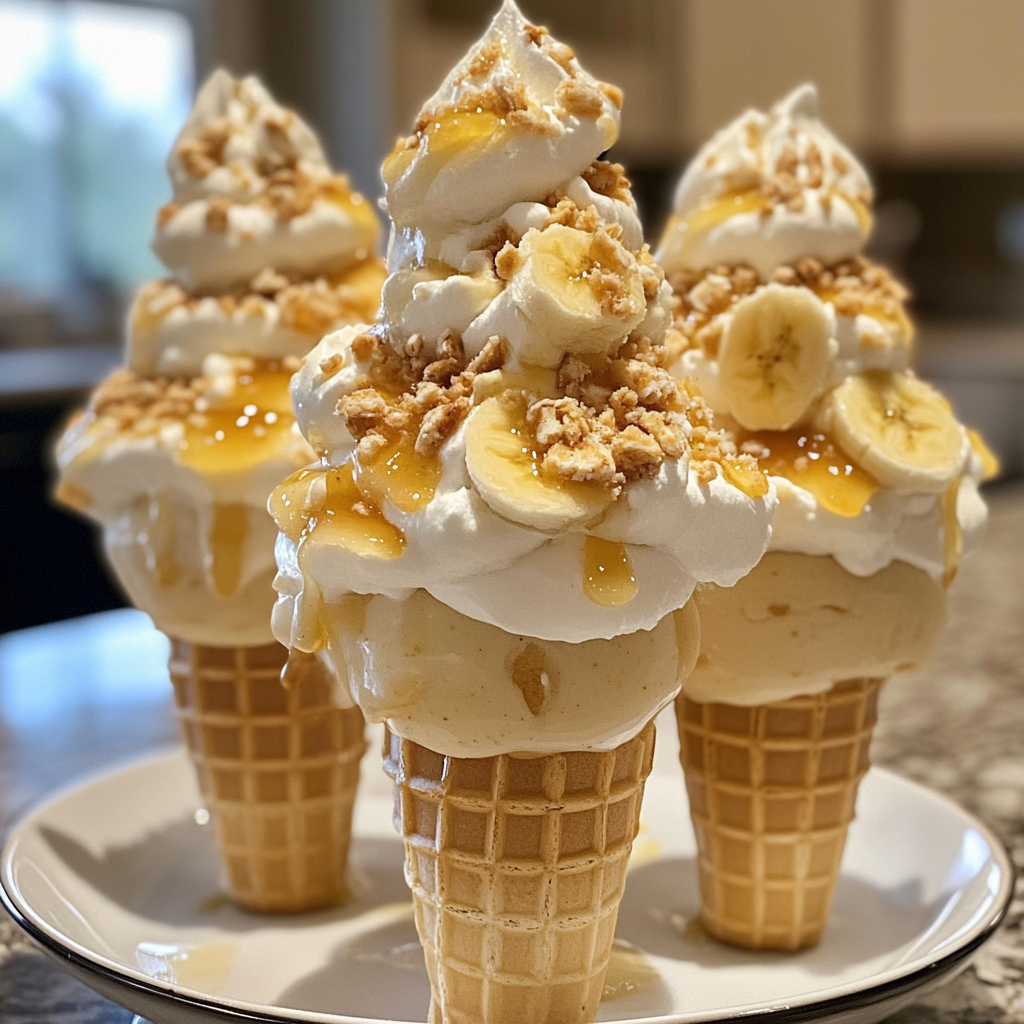
Assemble Your Cones: Start by scooping some cheesecake filling into each ice cream cone. Add sliced bananas on top before adding more filling to ensure every bite contains that delicious banana goodness.
Chill and Serve!: Refrigerate assembled cones for at least 30 minutes to set before serving. The chilling time allows all those flavors to meld beautifully together.
Now you are ready to serve these delectable Banana Pudding Cheesecake Cones! Enjoy sharing (or not) with friends and family while relishing every scrumptious bite! Strawberry Cheesecake Doughnut Burger. No Bake Cookie Dough Cheesecake.
You Must Know
- Banana Pudding Cheesecake Cones are not just desserts; they bring smiles and nostalgia
- These cones combine creamy cheesecake with banana pudding, making each bite feel like a sweet hug from your childhood
- Perfect for parties or casual afternoons, they’re fun and easy to prepare
Perfecting the Cooking Process
Start by preparing your cheesecake filling first, then layer it into the cones while the mixture chills. This ensures that every cone is perfectly filled and deliciously creamy.
Add Your Touch
Feel free to swap bananas for strawberries or add crushed cookies for extra crunch. This versatility lets you create your unique twist on these delightful cones.
Storing & Reheating
Store any leftover cones in an airtight container in the fridge for up to three days. To maintain freshness, keep the filling separate until you’re ready to serve.
Chef's Helpful Tips
- Make sure your cream cheese is at room temperature for easy blending
- Use ripe bananas for maximum sweetness and flavor in your cones
- Don’t overfill them; a little space allows for toppings without making a mess!
Sometimes, I whip these up when I need a quick dessert that impresses my friends. Their reactions are priceless, and it reminds me why I love baking!
FAQ
Can I make Banana Pudding Cheesecake Cones ahead of time?
Chocolate Marble Banana Bread.
Yes, you can prepare the filling a day before and assemble just before serving.
What can I use instead of vanilla wafers?
Graham crackers or crushed shortbread cookies work great as a substitute.
How long do these cones last in the fridge?
They’ll stay fresh for about three days if stored properly in an airtight container.
Did You Enjoy Making This Recipe? Please rate this recipe with ⭐⭐⭐⭐⭐ or leave a comment.
📖 Recipe Card
Print
Banana Pudding Cheesecake Cones
- Total Time: 30 minutes
- Yield: Makes 6 servings 1x
Description
Indulge in the delightful fusion of creamy cheesecake and sweet banana pudding, all encased in a crunchy cone. These Banana Pudding Cheesecake Cones are not only visually appealing but also incredibly easy to prepare, making them the perfect dessert for any occasion. With layers of flavor and texture, they’re sure to be a hit at your summer gatherings or cozy family nights.
Ingredients
- 1 cup graham cracker crumbs
- 4 tbsp unsalted butter, melted
- 8 oz cream cheese, softened
- 1/2 cup granulated sugar
- 3.4 oz instant banana pudding mix
- 1 cup whole milk
- 1 cup whipped topping (store-bought or homemade)
- 2 ripe bananas, sliced
- 6 ice cream cones (sugar cones recommended)
Instructions
- Preheat your oven to 350°F (175°C). Mix graham cracker crumbs with melted butter until combined. Press into the bottom of small cups or cones.
- In a bowl, beat the cream cheese until smooth; gradually mix in sugar until creamy.
- Whisk together banana pudding mix and milk until thickened. Fold into the cream cheese mixture.
- Gently fold in whipped topping until fully blended.
- Fill each cone with cheesecake mixture, adding sliced bananas between layers.
- Chill for at least 30 minutes before serving.
- Prep Time: 20 minutes
- Cook Time: 10 minutes
- Category: Dessert
- Method: Baking
- Cuisine: American
Nutrition
- Serving Size: 1 cone (90g)
- Calories: 295
- Sugar: 22g
- Sodium: 170mg
- Fat: 15g
- Saturated Fat: 8g
- Unsaturated Fat: 5g
- Trans Fat: 0g
- Carbohydrates: 37g
- Fiber: 1g
- Protein: 3g
- Cholesterol: 28mg
